> ## Documentation Index
> Fetch the complete documentation index at: https://docs.a0.dev/llms.txt
> Use this file to discover all available pages before exploring further.
# Android FCM Setup
> Set up Firebase Cloud Messaging credentials for Android push notifications
# Android FCM Setup
a0 uses Firebase Cloud Messaging (FCM v1) to deliver push notifications to Android devices. You need two files from Firebase:
| File | Purpose |
| -------------------------------- | ------------------------------------------------------------------------------ |
| **google-services.json** | Registers your Android app with Firebase. Injected into the APK at build time. |
| **Firebase service account key** | Private key used by a0's servers to send notifications via the FCM v1 API. |
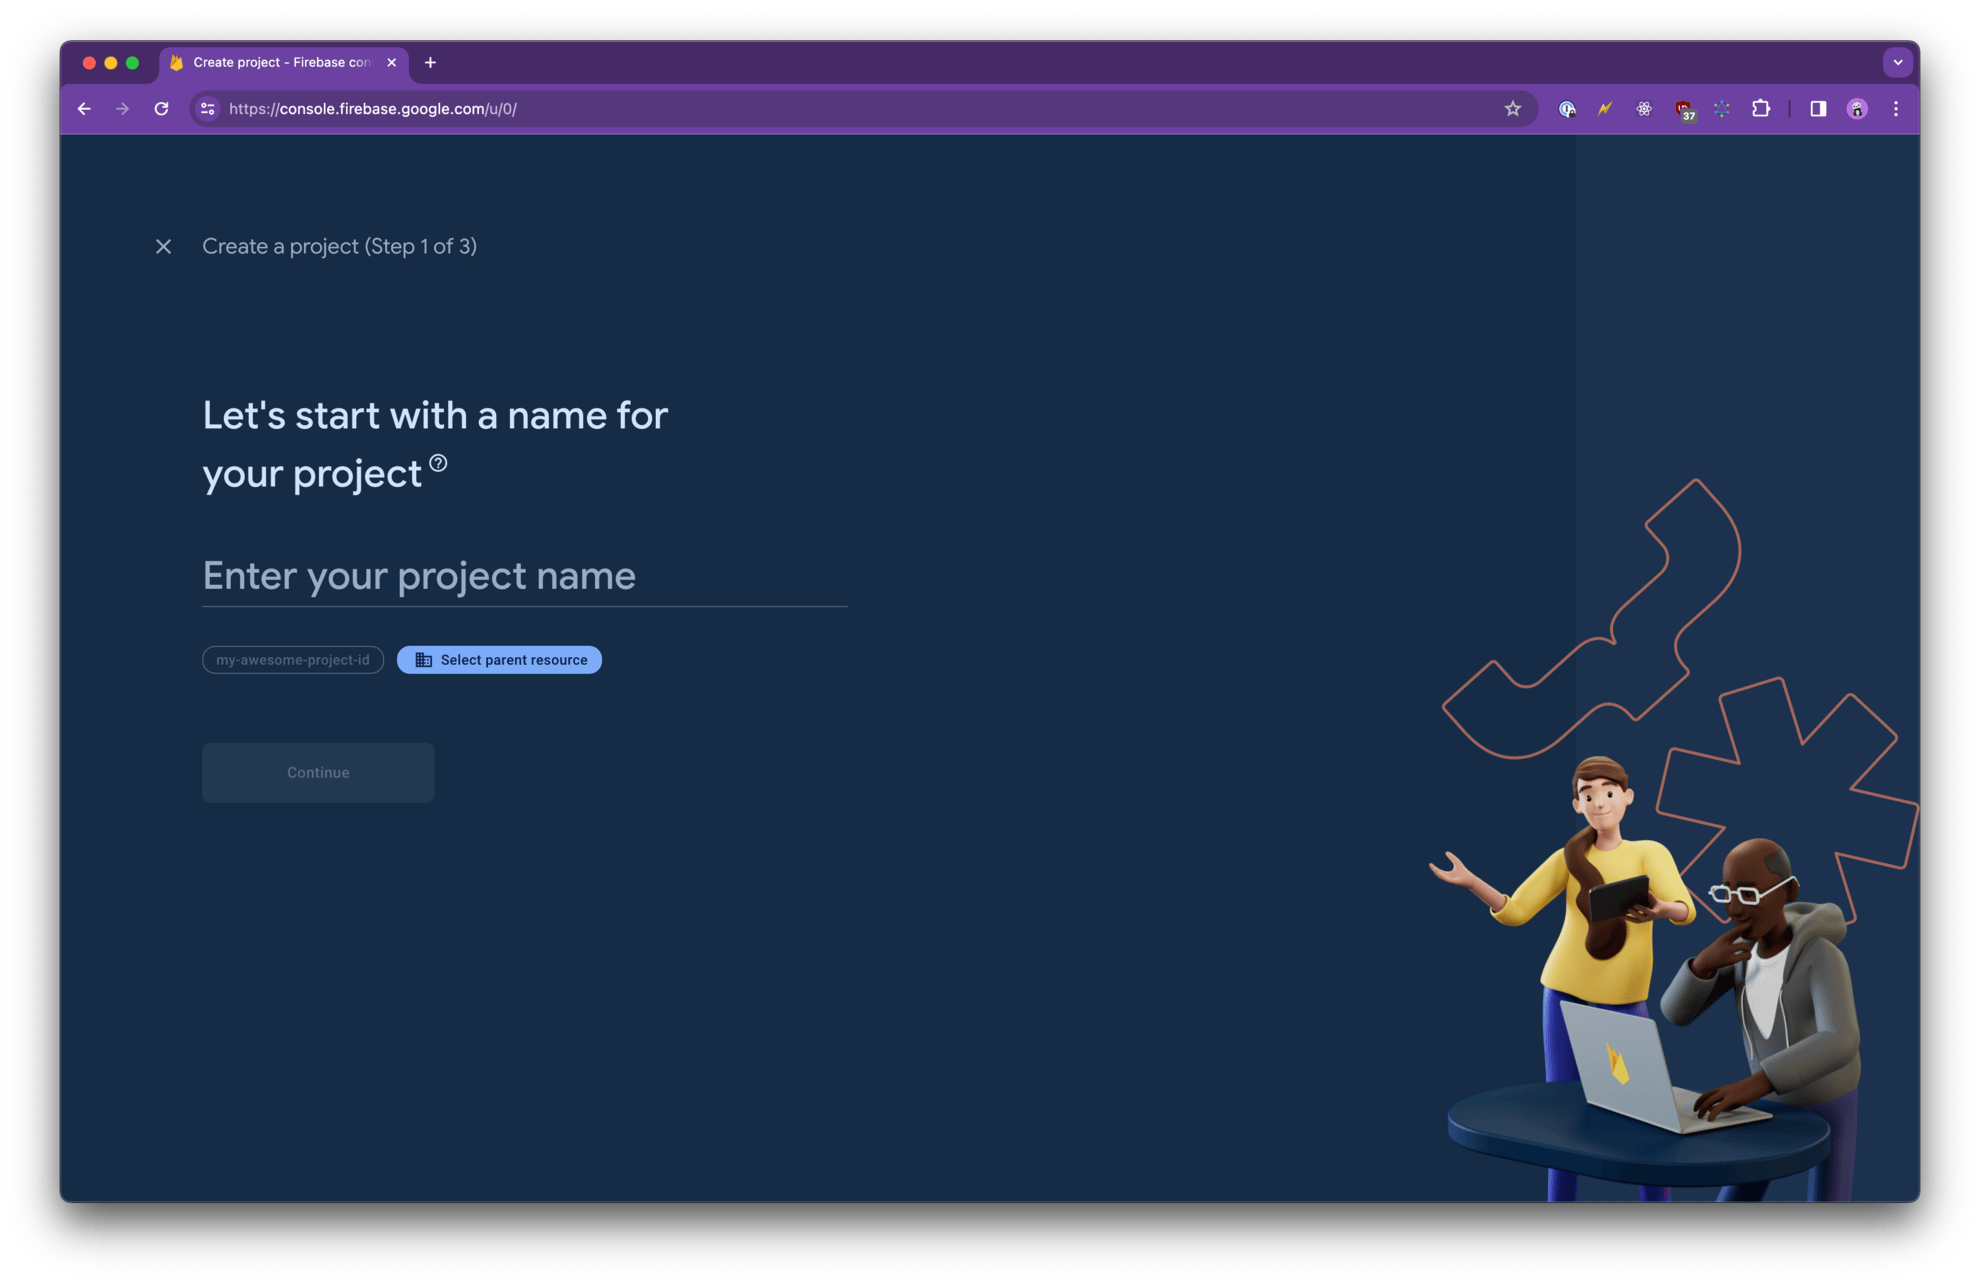
## Step 1: Create a Firebase project
If you already have a Firebase project for your app, skip to Step 2.
1. Open the [Firebase Console](https://console.firebase.google.com/)
2. Click **Add project** and follow the setup wizard
 ## Step 2: Download google-services.json
This file contains your Firebase project's public configuration and is required for your Android app to connect to Firebase.
1. In the [Firebase Console](https://console.firebase.google.com/), open **Project settings** (gear icon)
2. Under **Your apps**, select your Android app (or click **Add app** → **Android** if you haven't added one yet)
3. Enter your Android package name — this should match the bundle identifier used in your a0 project
4. Click **Download google-services.json**
## Step 2: Download google-services.json
This file contains your Firebase project's public configuration and is required for your Android app to connect to Firebase.
1. In the [Firebase Console](https://console.firebase.google.com/), open **Project settings** (gear icon)
2. Under **Your apps**, select your Android app (or click **Add app** → **Android** if you haven't added one yet)
3. Enter your Android package name — this should match the bundle identifier used in your a0 project
4. Click **Download google-services.json**
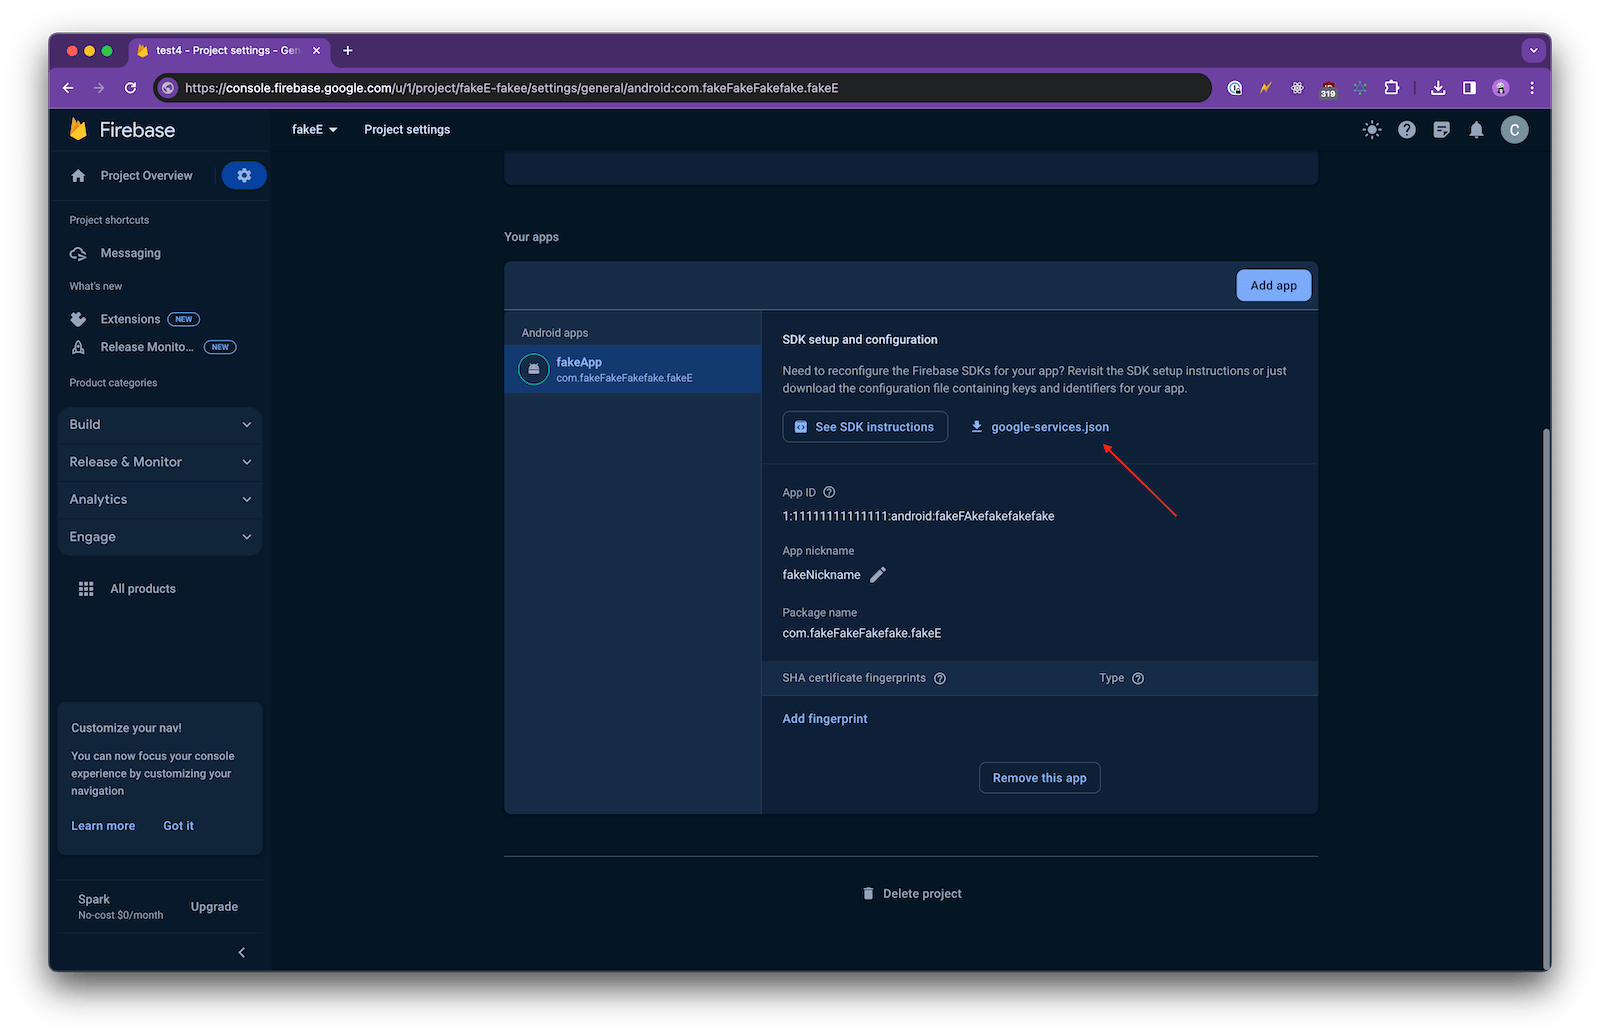 This file contains public-facing identifiers and is safe to commit to your repository. It does **not** contain any private keys.
## Step 3: Create a Firebase service account key
The service account key is a private JSON file that authorizes a0's servers to send push notifications on your behalf via the FCM v1 API.
1. In the Firebase Console, open **Project settings** → [**Service accounts**](https://console.firebase.google.com/project/_/settings/serviceaccounts/adminsdk)
2. Make sure **Firebase Admin SDK** is selected
This file contains public-facing identifiers and is safe to commit to your repository. It does **not** contain any private keys.
## Step 3: Create a Firebase service account key
The service account key is a private JSON file that authorizes a0's servers to send push notifications on your behalf via the FCM v1 API.
1. In the Firebase Console, open **Project settings** → [**Service accounts**](https://console.firebase.google.com/project/_/settings/serviceaccounts/adminsdk)
2. Make sure **Firebase Admin SDK** is selected
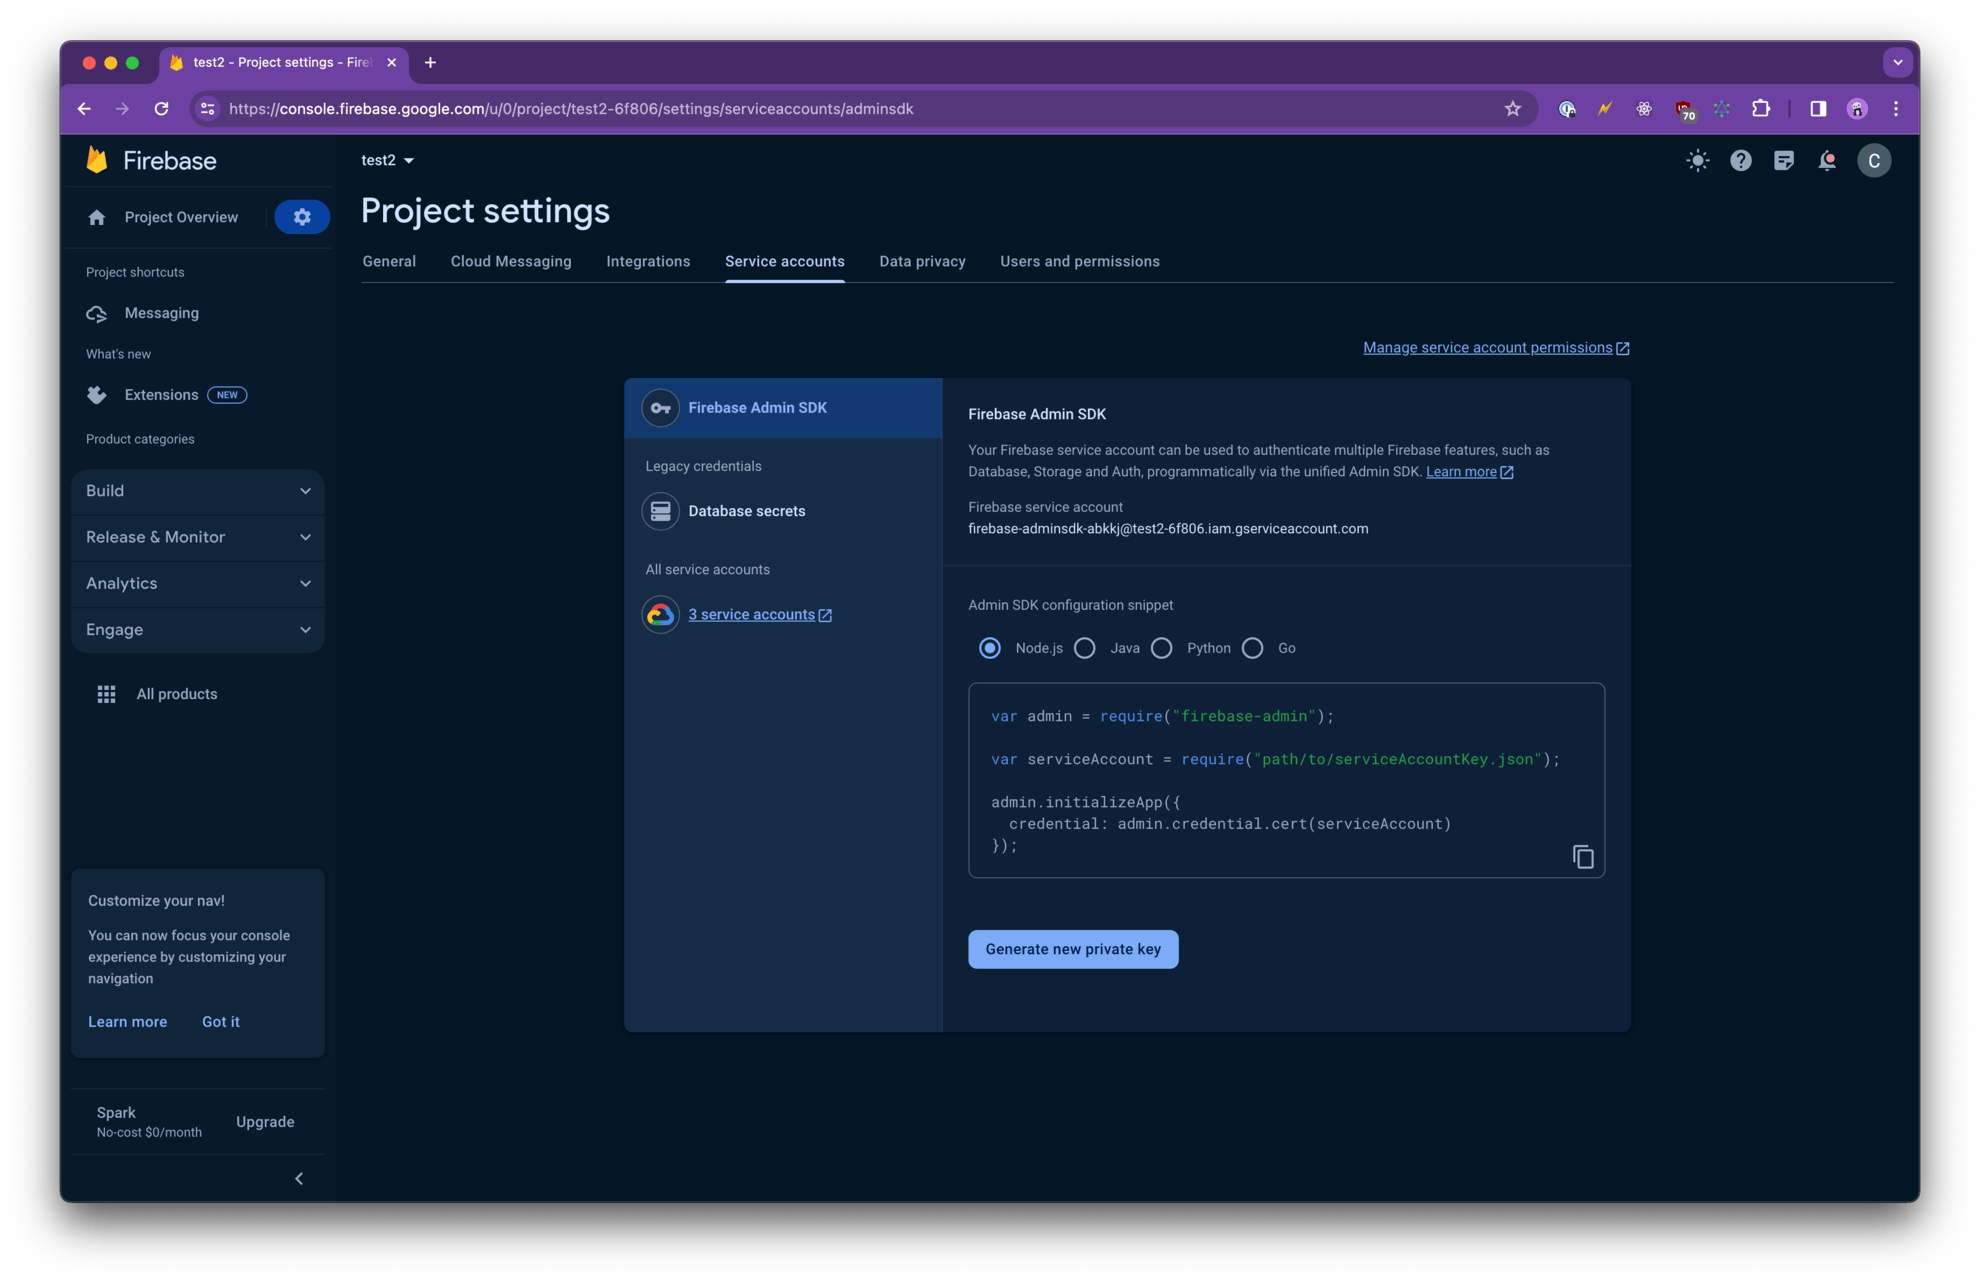 3. Click **Generate New Private Key**
4. Confirm by clicking **Generate Key** — a JSON file will download
3. Click **Generate New Private Key**
4. Confirm by clicking **Generate Key** — a JSON file will download
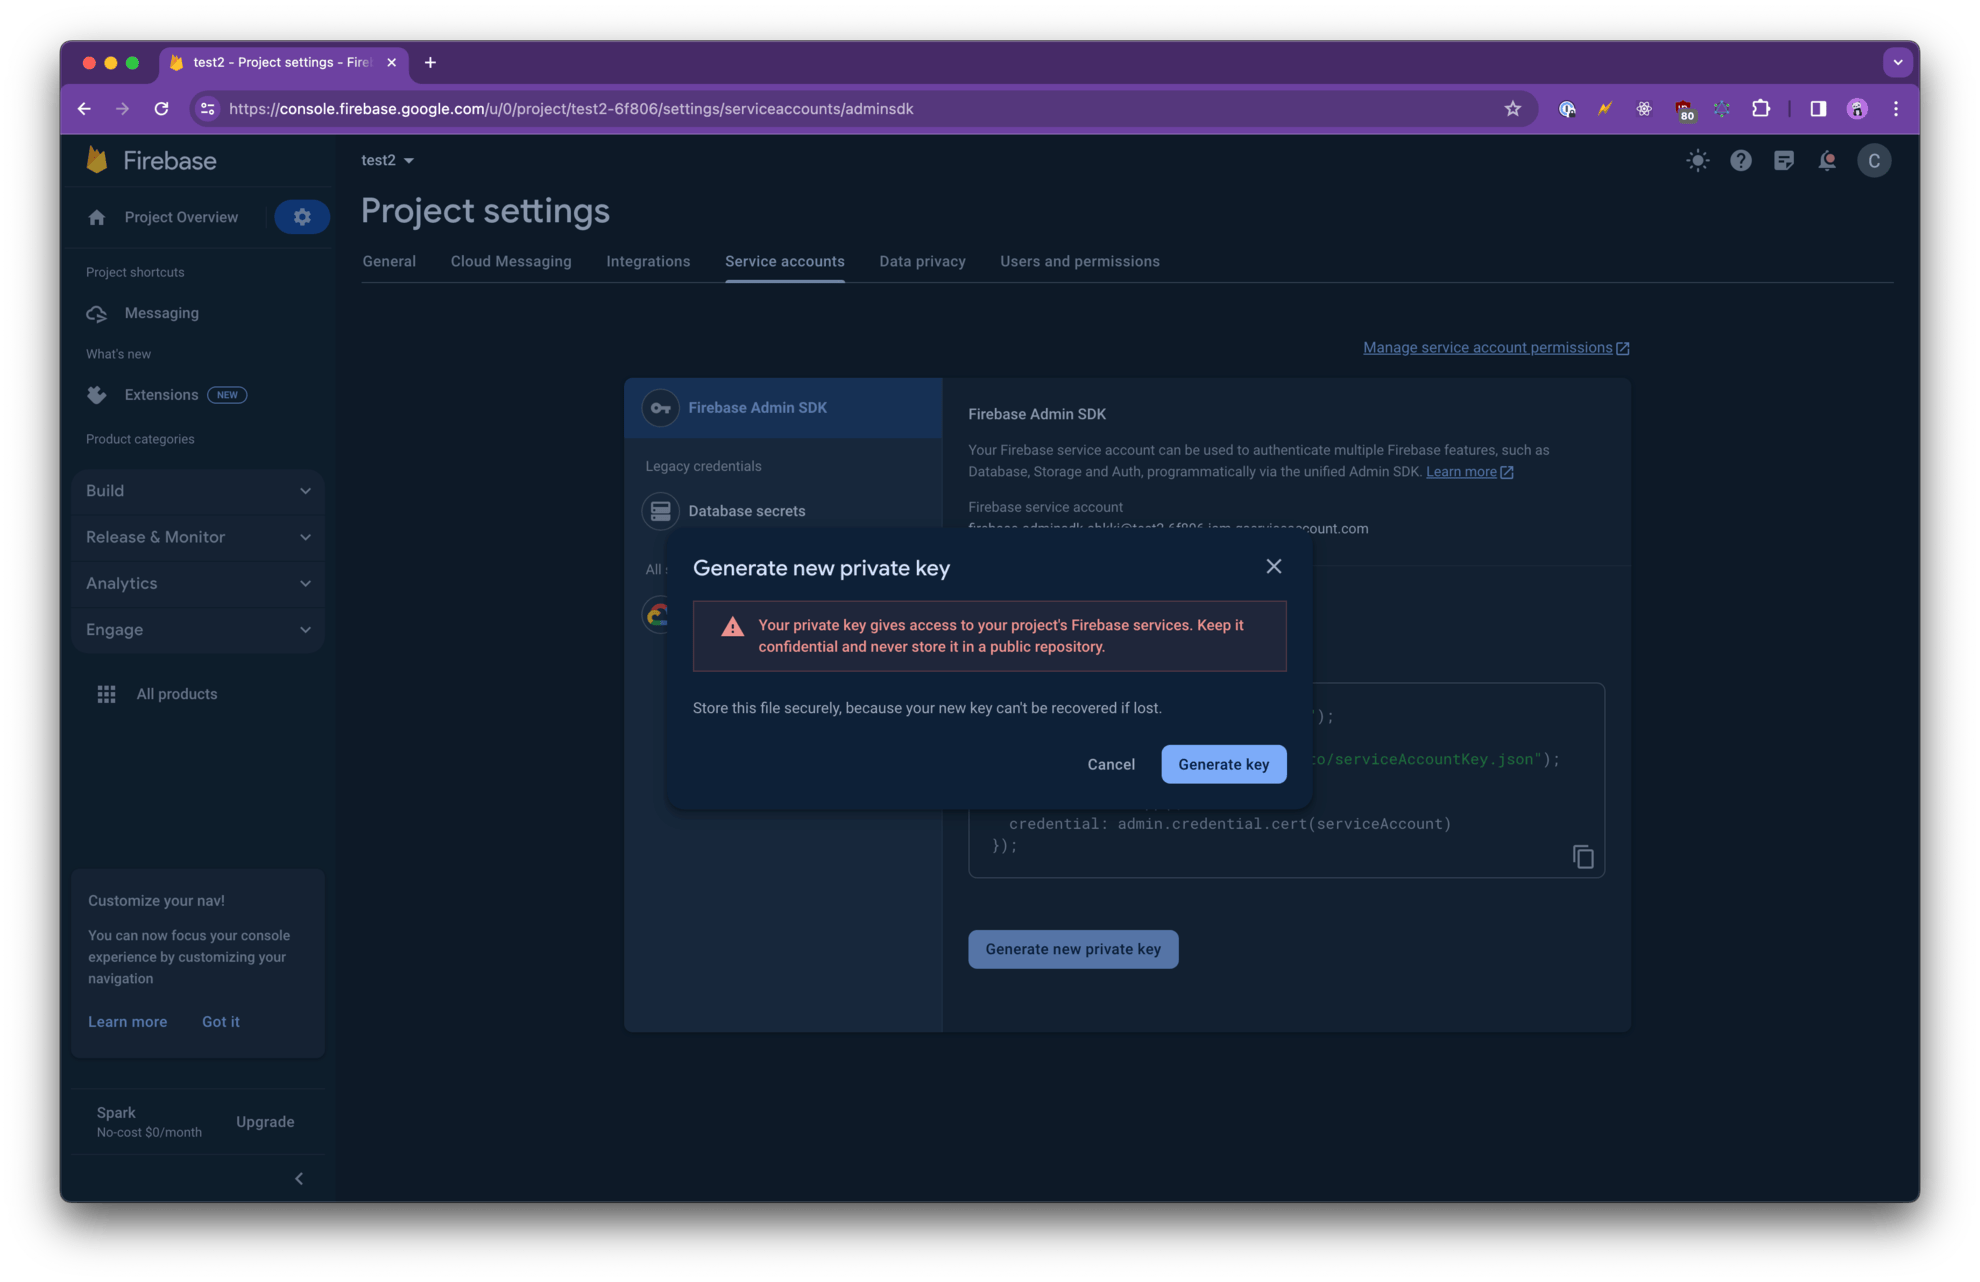 Store this file securely. It contains a private key that grants access to send notifications to your app. **Do not** commit it to your repository.
### Using an existing service account
If you already have a Google Cloud service account and want to reuse it for FCM:
1. Open the [IAM Admin page](https://console.cloud.google.com/iam-admin/iam) in Google Cloud Console
2. Find the service account you want to use and click the pencil icon to **Edit Principal**
Store this file securely. It contains a private key that grants access to send notifications to your app. **Do not** commit it to your repository.
### Using an existing service account
If you already have a Google Cloud service account and want to reuse it for FCM:
1. Open the [IAM Admin page](https://console.cloud.google.com/iam-admin/iam) in Google Cloud Console
2. Find the service account you want to use and click the pencil icon to **Edit Principal**
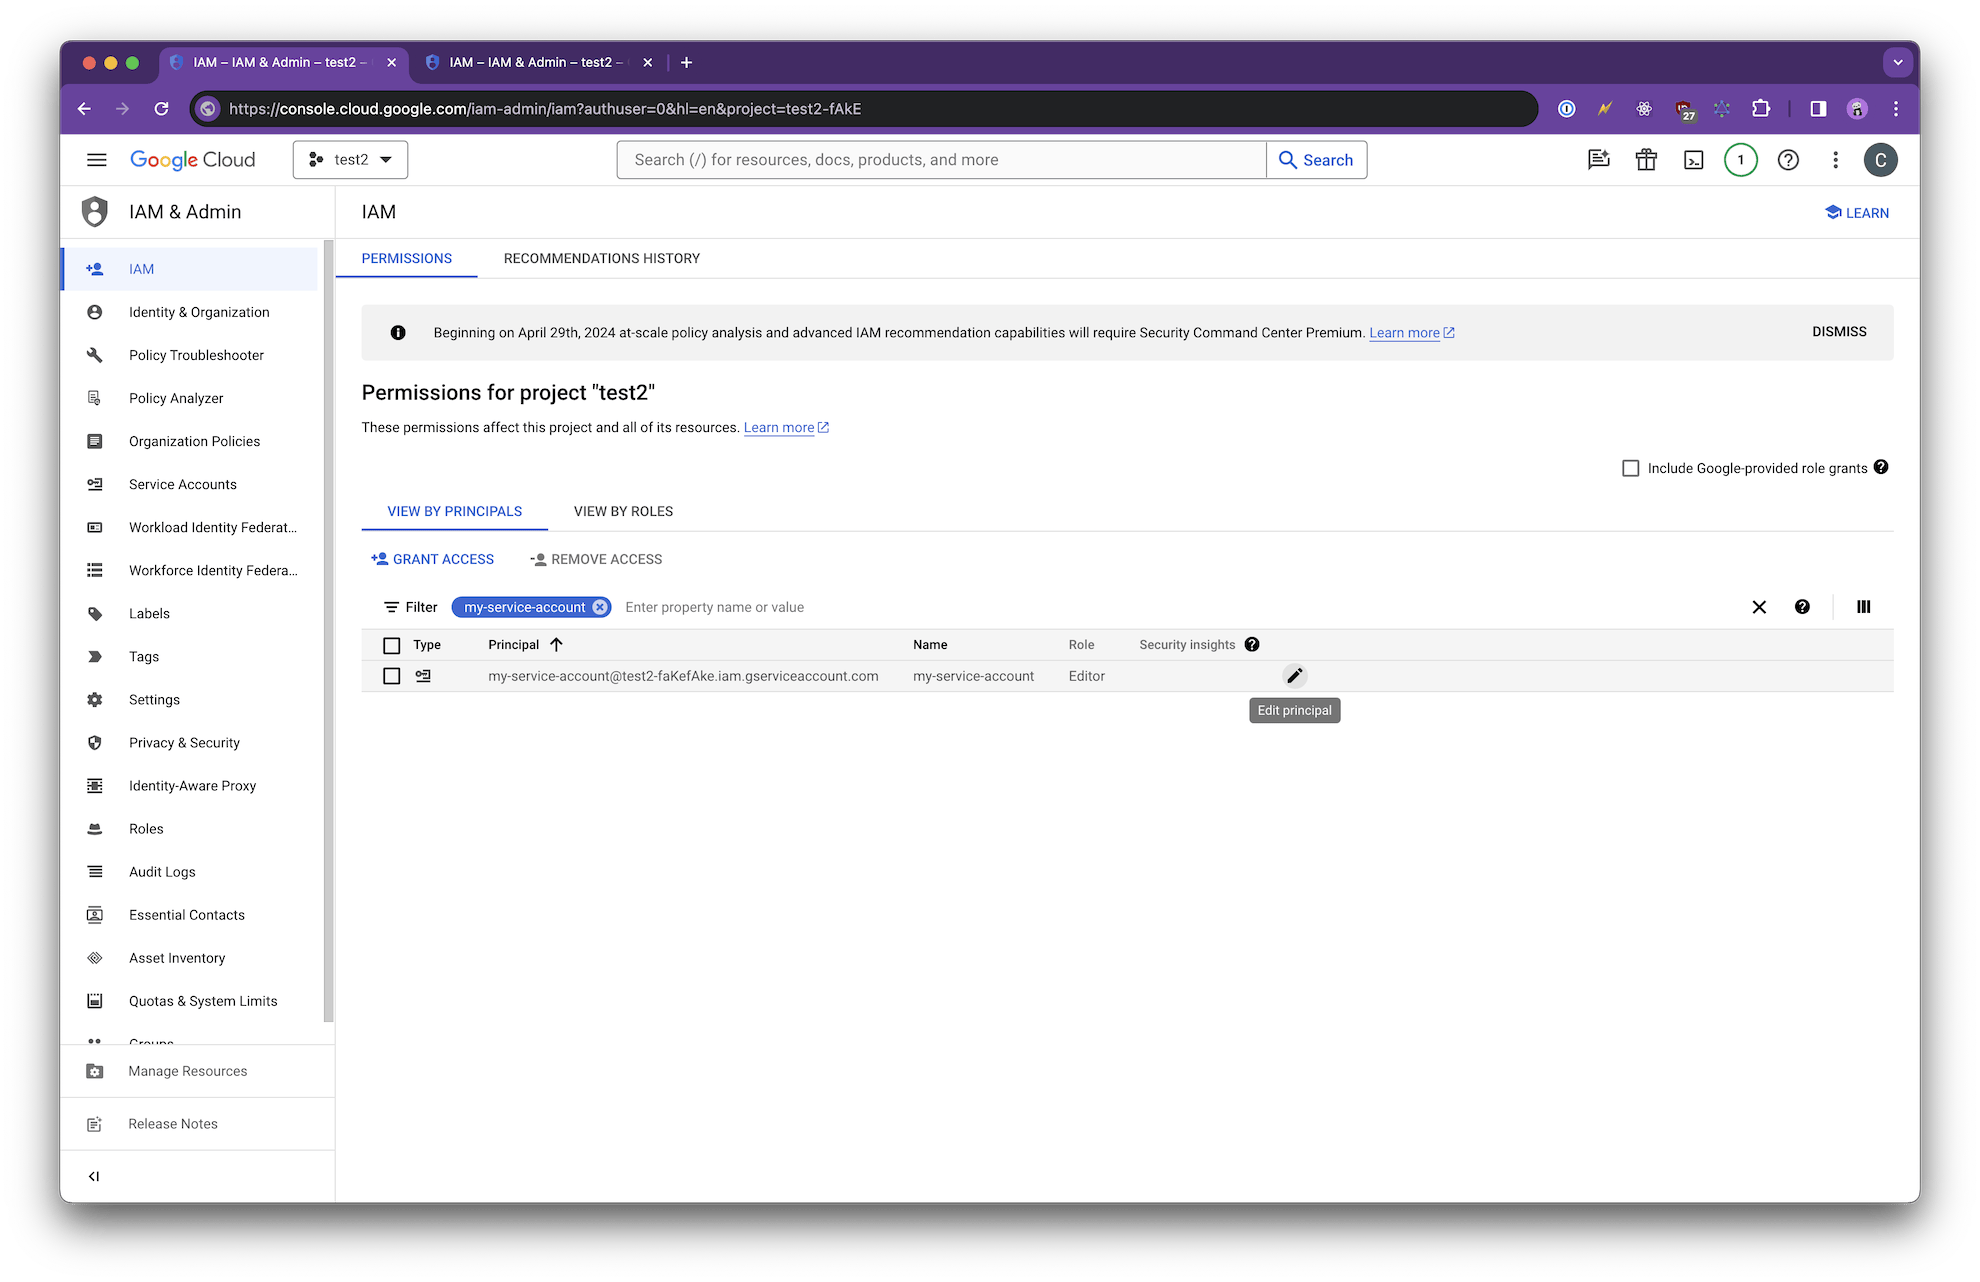 3. Click **Add Role** and select **Firebase Cloud Messaging API Admin**
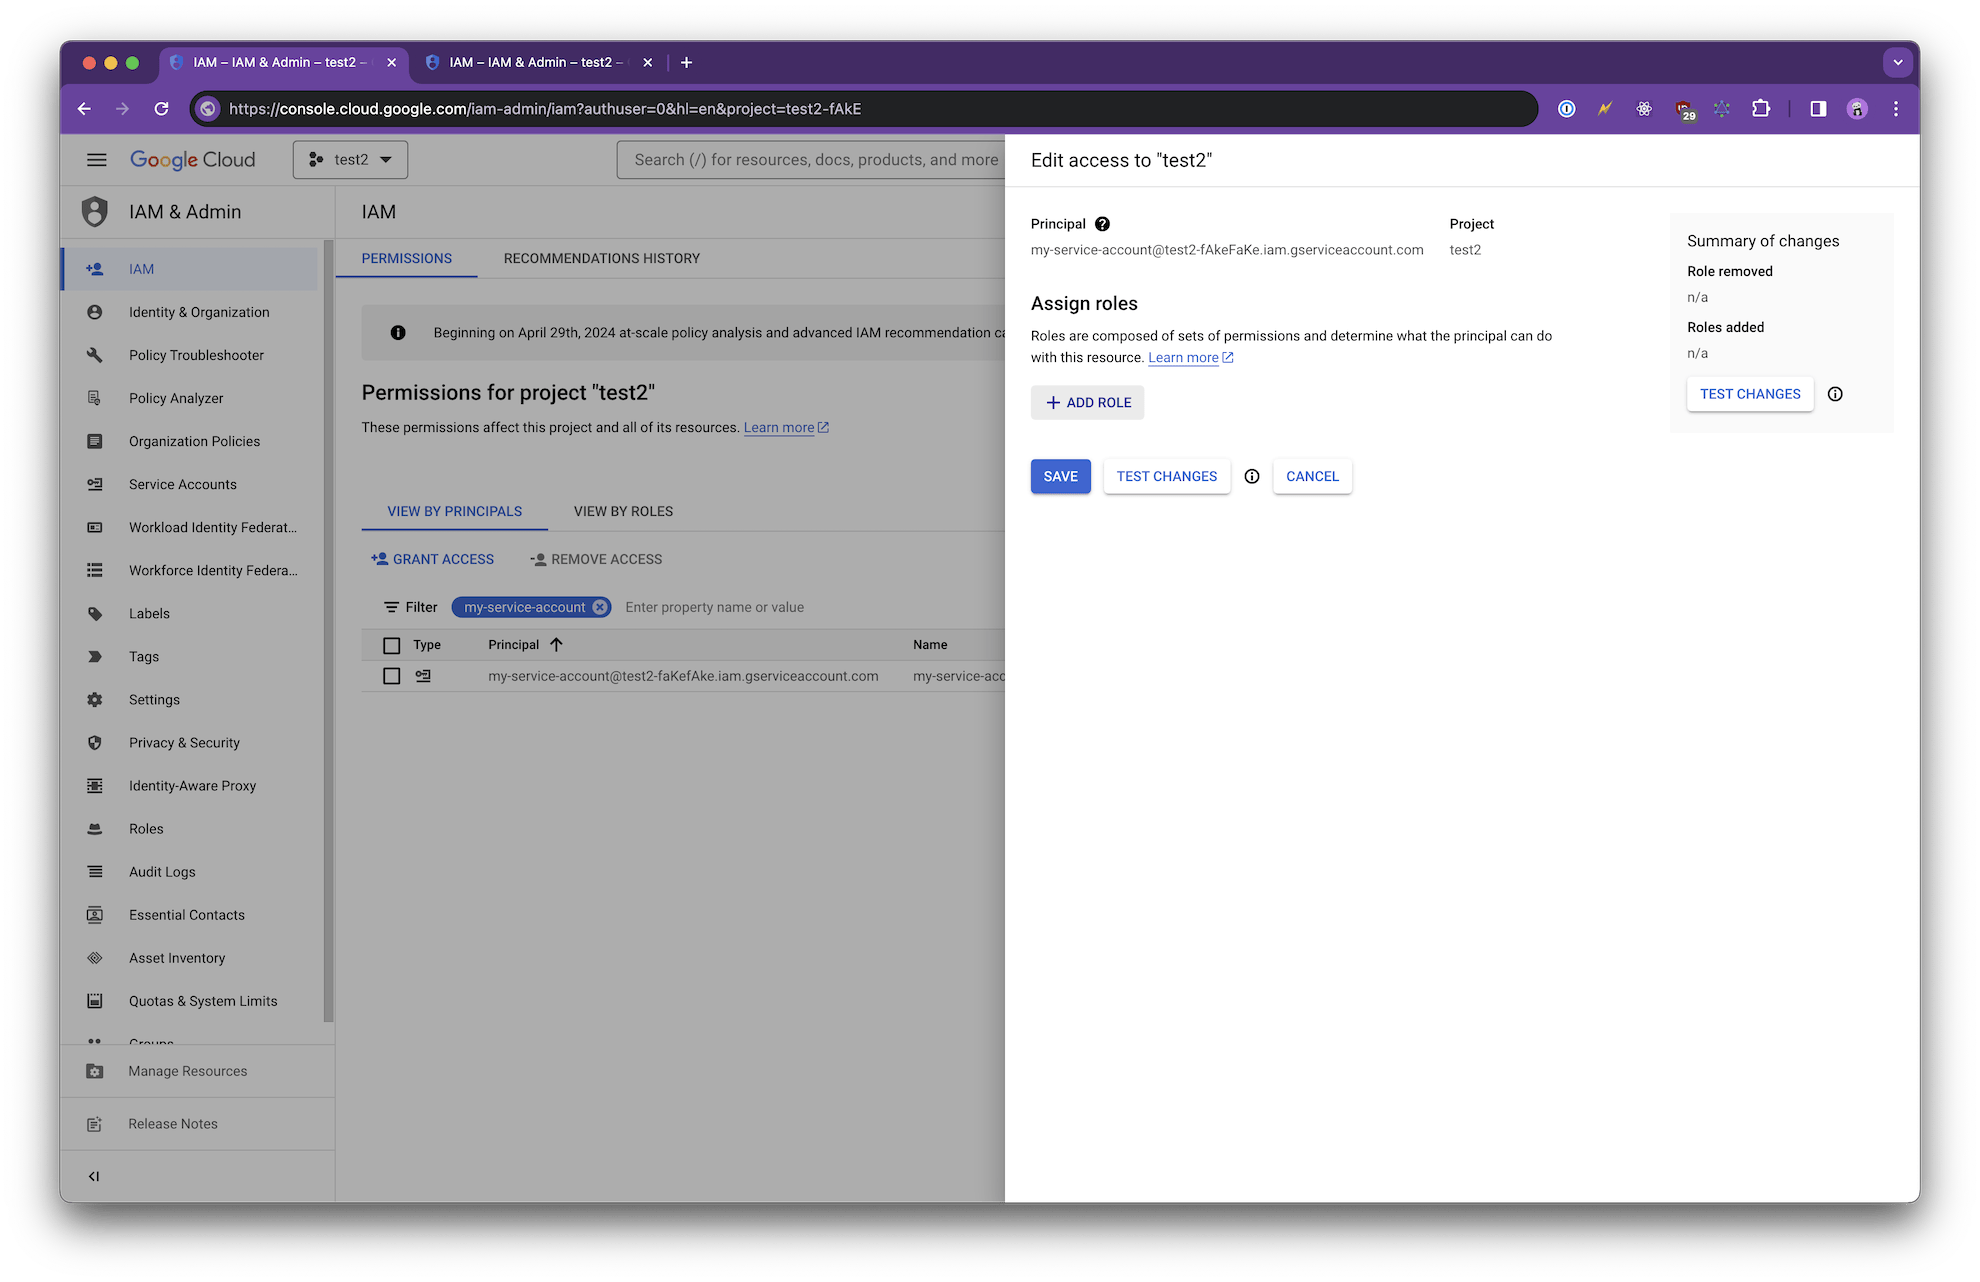 4. Click **Save**
5. Download a new JSON key for this service account if you don't already have one
## Step 4: Upload to a0
1. Open your project in a0
2. Go to **Project Settings** → **Build Settings** → **Android Credentials**
3. Upload your **google-services.json** file
4. Upload your **Firebase service account** key file
5. Build a new custom APK — the credentials will be included automatically
Both files will show a **Configured** badge once uploaded. You can replace or delete them at any time.
After uploading new credentials, you need to create a new APK build for the changes to take effect. Existing builds will continue using the credentials they were built with.
## Helpful links
* [Firebase Console](https://console.firebase.google.com/)
* [Firebase Service Accounts](https://console.firebase.google.com/project/_/settings/serviceaccounts/adminsdk)
* [Google Cloud IAM Admin](https://console.cloud.google.com/iam-admin/iam)
* [FCM v1 API documentation](https://firebase.google.com/docs/cloud-messaging/migrate-v1)
* [Push Notifications guide](/development/push-notifications)
4. Click **Save**
5. Download a new JSON key for this service account if you don't already have one
## Step 4: Upload to a0
1. Open your project in a0
2. Go to **Project Settings** → **Build Settings** → **Android Credentials**
3. Upload your **google-services.json** file
4. Upload your **Firebase service account** key file
5. Build a new custom APK — the credentials will be included automatically
Both files will show a **Configured** badge once uploaded. You can replace or delete them at any time.
After uploading new credentials, you need to create a new APK build for the changes to take effect. Existing builds will continue using the credentials they were built with.
## Helpful links
* [Firebase Console](https://console.firebase.google.com/)
* [Firebase Service Accounts](https://console.firebase.google.com/project/_/settings/serviceaccounts/adminsdk)
* [Google Cloud IAM Admin](https://console.cloud.google.com/iam-admin/iam)
* [FCM v1 API documentation](https://firebase.google.com/docs/cloud-messaging/migrate-v1)
* [Push Notifications guide](/development/push-notifications)